
Make LinkedIn job alerts do the searching: a daily routine
Build sharp saved searches, set daily alerts, and clear the results in minutes each morning, using JobWhat to skip jobs you've already seen.
7 min readJobWhat Team
- Job alerts
- Productivity
Typing a fresh search into LinkedIn every morning feels productive, but it isn't consistent. You use slightly different words, forget a filter, and scroll past listings you dismissed yesterday. A saved search with a daily job alert fixes that. You write the query once, LinkedIn reruns it every day, and you review what's new while the applicant pool is still small. You also decide what you're looking for once, when you're thinking clearly, rather than every night while scrolling.
Below: how to build alerts worth keeping, how to set them up, a short daily routine, and how JobWhat speeds up that routine.
Build the query before you save it
An alert is only as good as its search. Get the results page right first, then turn on the alert.
Keywords with Boolean operators. LinkedIn's keyword box accepts quotes, OR, NOT and parentheses. Write the operators in capitals:
"platform engineer" OR "infrastructure engineer"("site reliability" OR SRE) NOT intern"product designer" NOT (senior OR staff OR principal)if you're earlier in your career
Location and workplace type. Set a specific metro, such as "San Francisco Bay Area," rather than a whole country, and use the Remote, Hybrid and On-site filters to match what you'll actually accept. If you'd take remote anywhere but on-site only locally, that's two alerts, not one.
Experience level. Filtering by level removes a lot of noise, but employers tag levels inconsistently, so check that a strict filter isn't hiding good matches.
Easy Apply or not. Easy Apply jobs are quick to apply to inside LinkedIn and tend to draw lots of applicants. Without the filter you also get jobs that send you to the company's own site, often on applicant tracking systems (ATSs) like Greenhouse, Lever, Ashby or Workday. Pick on purpose.
Under 10 applicants. This option under All filters narrows the list to less crowded postings. It's LinkedIn's own count and misses people who applied on the company's site, but it's a useful signal.
Time window. When you pick a Date posted option, LinkedIn adds f_TPR to the URL: r86400 is the past 24 hours (86,400 seconds), r604800 the past week. For a daily alert, a 24-hour window keeps results focused. LinkedIn doesn't document this parameter, so treat it as a shortcut, not a guarantee. Our LinkedIn job search tricks post has more.
Save it, name it, and keep alerts narrow
On the results page, scroll to the bottom of the results list and turn on the job alert toggle (Set alert, or Get job alerts for this search in some layouts). It sits below the job cards, not at the top of the page. LinkedIn names the alert after your keywords and location, so descriptive keywords help: "platform engineering bay area" is easier to spot in your notifications than a long Boolean string.
- One alert per role and location. "Platform engineer, Bay Area, hybrid" and "Platform engineer, US remote" should be separate alerts, so each notification is easy to scan.
- Start with three to five. Once you've learned to ignore a noisy alert, it's hard to start trusting alerts again.
- Prune every week or two. Add a
NOTfor the pattern you keep skipping. If an alert has shown you nothing worth applying to in two weeks, delete it.
- Keywords
"platform engineer" OR SRE - Location
San Francisco Bay Area - Workplace
Hybrid · Remote - Experience
Mid-Senior - Date posted
Past 24 hours
- FrequencyDaily
- Notify byEmail or notification
- ReviewPrune every 1–2 weeks
Frequency and notification type
Open an alert's settings (the Edit job alert dialog) and you'll see two choices.
Alert frequency: Daily or Weekly. For an active search, choose Daily. A weekly alert collects a week of postings, and the early ones are crowded by the time you see them. Weekly suits exploratory searches.
Notification type: Email and notification, Email, or Notification.
- Notification shows up in LinkedIn and its mobile app. It's quick to act on and keeps your inbox clear, but it's easy to miss among other LinkedIn notifications.
- Email gives you a lasting list you can search and come back to, at the cost of inbox clutter.
- Email and notification is safest if you tend to miss things, but you see everything twice.
Pick one main channel so there's one place to check each morning.
Managing, editing and deleting alerts
Your alerts live in LinkedIn's job alert settings, reached from the Jobs page (look for Job alerts or Preferences; the location has moved over time). There you can change frequency and notification type or choose Delete job alert. After a delete, LinkedIn briefly shows "Job alert has been deleted" with an Undo link. If you meant to edit instead, click Undo right away.
A 15-minute daily routine
- Open each alert. Tap the notification or email, or rerun the saved search. Either way you land on a job results page. Sort by Most recent.
- Triage fast. Skim title, company, location and pay, and decide: apply, save for later, or skip. Only open postings whose card earns it.
- Apply to the best one or two first, while the pool is small.
- Record what you did, or tomorrow's run makes you evaluate the same reposted listings again.
Step 4 is where most routines break down. That's the part JobWhat handles.
- 8:00Alerts arriveLinkedInDaily email or LinkedIn notification for each saved search.
- 8:02Open results, sort by Most recentLinkedInLand on the job results page, not the notifications page.
- 8:04JobWhat scanJobWhatYellow, green and blue cards are ones you've handled; hide the noise with −.
- 8:08Queue company-site jobsJobWhatPress ≡; each opens in a background tab and fills.
- 8:12Review and applyYouCheck each Hit Submit tab and press Submit on the best one or two.
- 8:15Done, loggedJobWhatEverything is in the job log, so tomorrow shows only new jobs.
Where JobWhat fits
JobWhat is a Chrome extension that adds controls to LinkedIn job results. It works on LinkedIn's job pages (search results and the collections pages alert links often open), not on the notifications page itself. So open the alert and do your triage on the results page.
See what you've already handled. Cards are colored by state: yellow for viewed, green for applied, blue for queued, with hidden jobs greyed out or removed. Jobs in your log get a chip such as "Applied · 3d ago." On day two of an alert, the new results stand out.
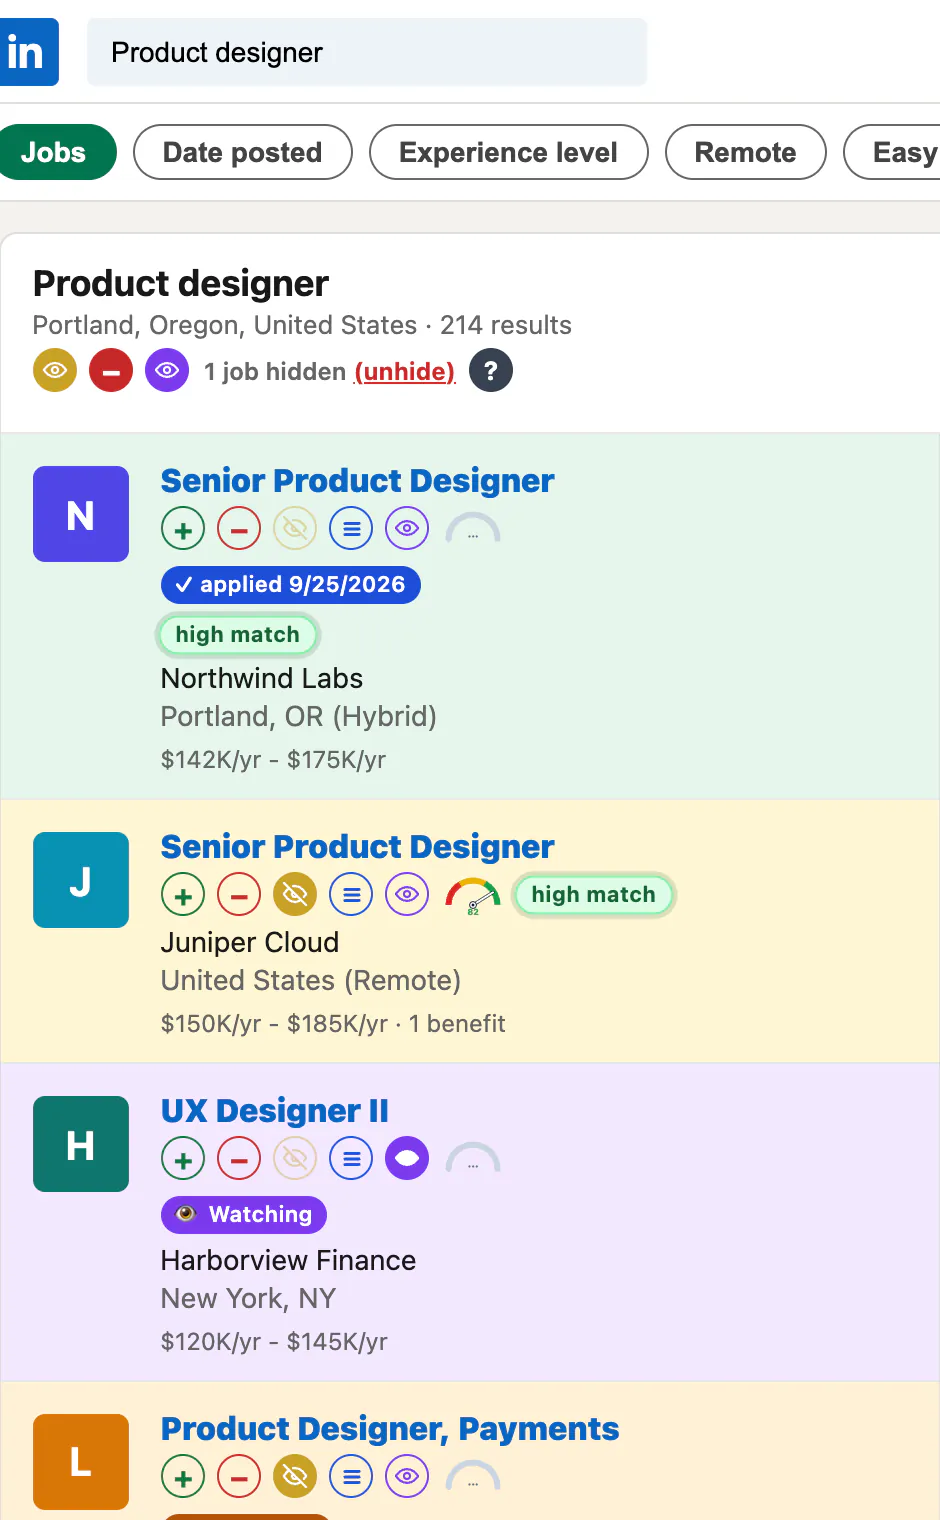
Hide, log, watch and queue from the card. Under each job: − hides it, + logs it, a watch button saves it for later, and ≡ adds it to the apply queue. Hiding is per job, not per company, and changes nothing in your LinkedIn account. Batch buttons can mark the rest of the page viewed or hidden, or watch every visible job.
An apply queue for company-site jobs. Queued jobs open one at a time in a background tab, where JobWhat follows the Apply link and fills the form on Greenhouse, Ashby, Lever or Gem. On Greenhouse, Lever and Ashby, Auto Submit (on by default; you can turn it off in Settings) presses Submit when every field is filled and nothing needs review. Otherwise the run ends as Hit Submit with the tab left open: green when every required field was filled, red when some need you. Easy Apply and Workday jobs can't be queued.
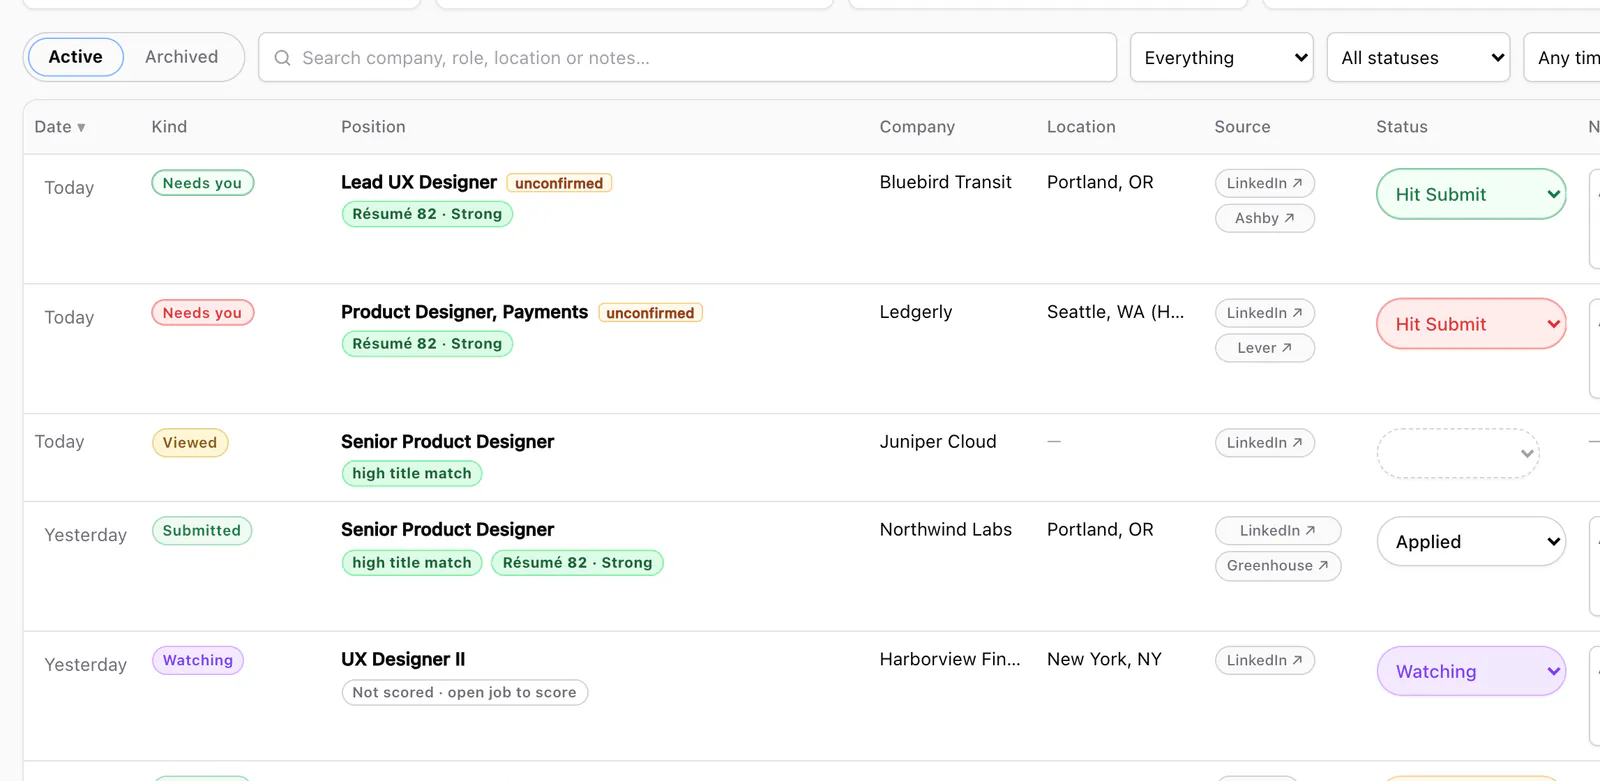
One job log. Everything you view, hide, watch, queue or apply to lands in one searchable log with statuses, notes, reminders and CSV export. When JobWhat knows a job's apply link, a chip names the ATS (for example Greenhouse) and opens the apply page.
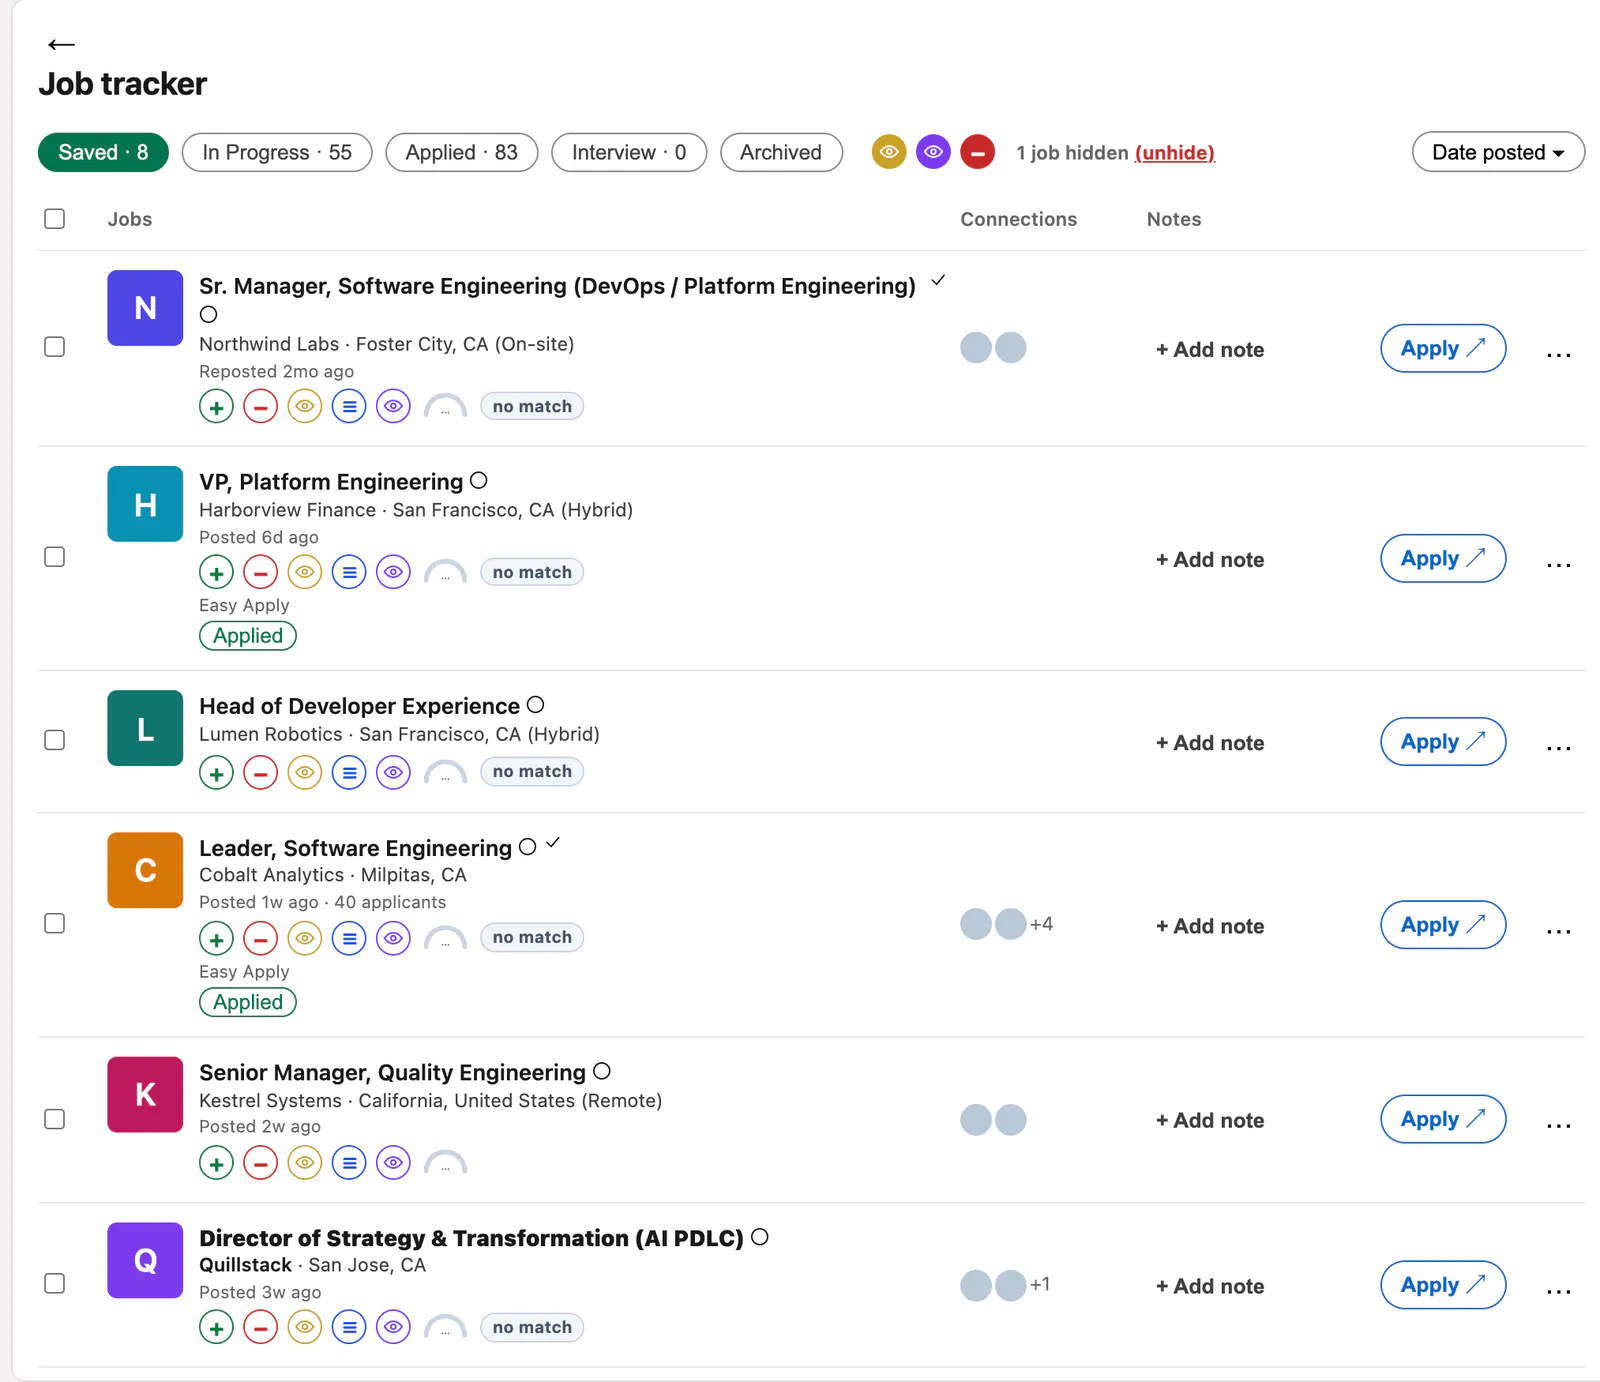
The same buttons appear on LinkedIn's own job tracker, so saved and applied jobs there can be hidden, watched or queued too.
Resume match. Score a posting against your resume before applying: a match score, how your level lines up with the role, each requirement compared, and suggested bullet changes. It's opt-in and sends the job description and a text summary of your resume to an AI model.
Autofill on the ATS. On Greenhouse, Ashby, Lever, Workday, Gem and Rippling, Autofill fills contact details, links, work authorization, education, self-identification answers and your resume from a profile you set up once. You review and submit.
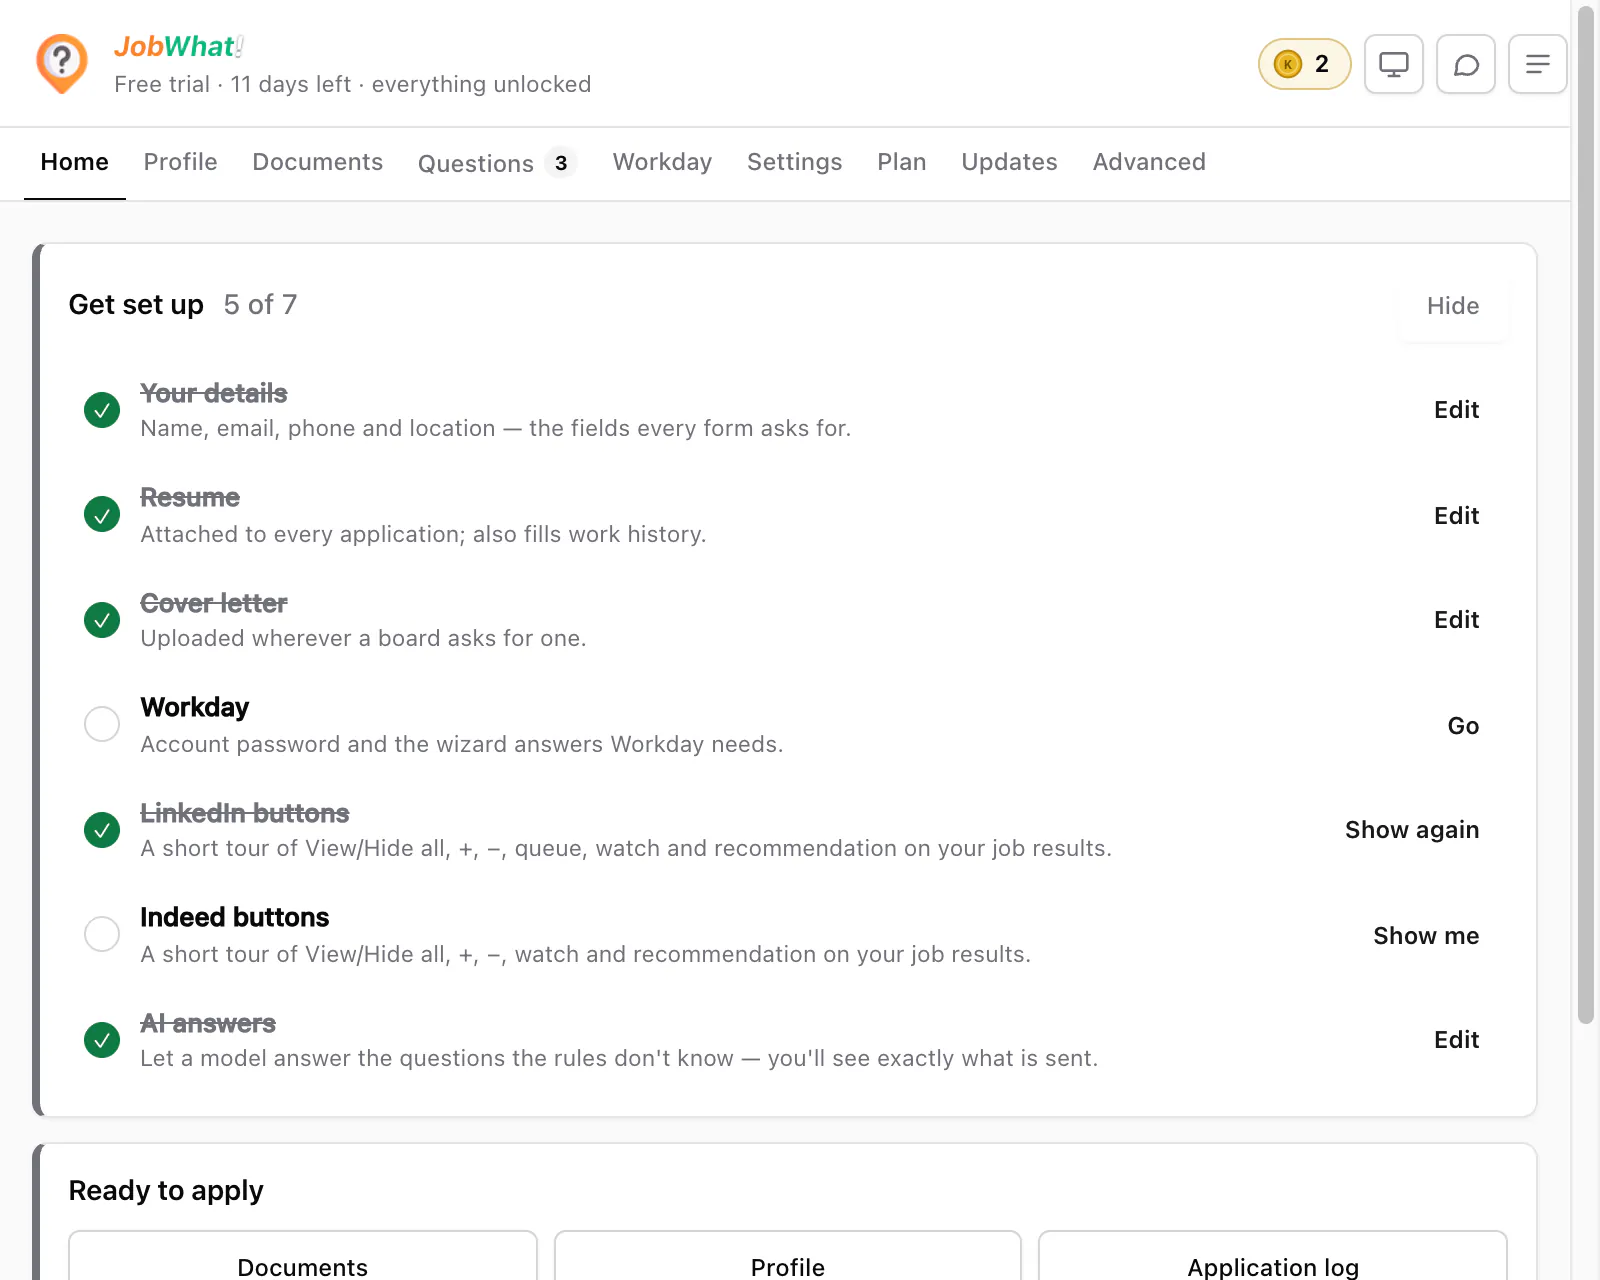
Free and Pro. Every install gets all of Pro free for 14 days, with no card and no account. After that, the log and export stay free, along with a monthly allowance of 20 autofills, 20 queued jobs, 100 views, hides and watches each, and a one-time amount of AI to try it. Pro ($9 a month or $49 a year) raises those limits, makes views, hides and watches unlimited, and adds AI answers for unusual application questions.
Checklist
- Check the query first: Boolean keywords, one metro, workplace type, level, 24-hour window.
- One alert per role and location; start with three to five.
- Set Daily and pick one main notification channel.
- Prune noisy alerts every week or two.
- Each morning: open the alert, sort by most recent, triage, apply early.
- Hide, watch, queue or log every result so tomorrow shows only new jobs.
Add JobWhat to Chrome and try every feature free for 14 days.